Overview
This page provides a high level overview of how Waave integration works to provide an intuitive and secure payment experience.
Please familiarise yourself with the basic concepts before proceeding to the other guides.
Payment Flow - Online Flow
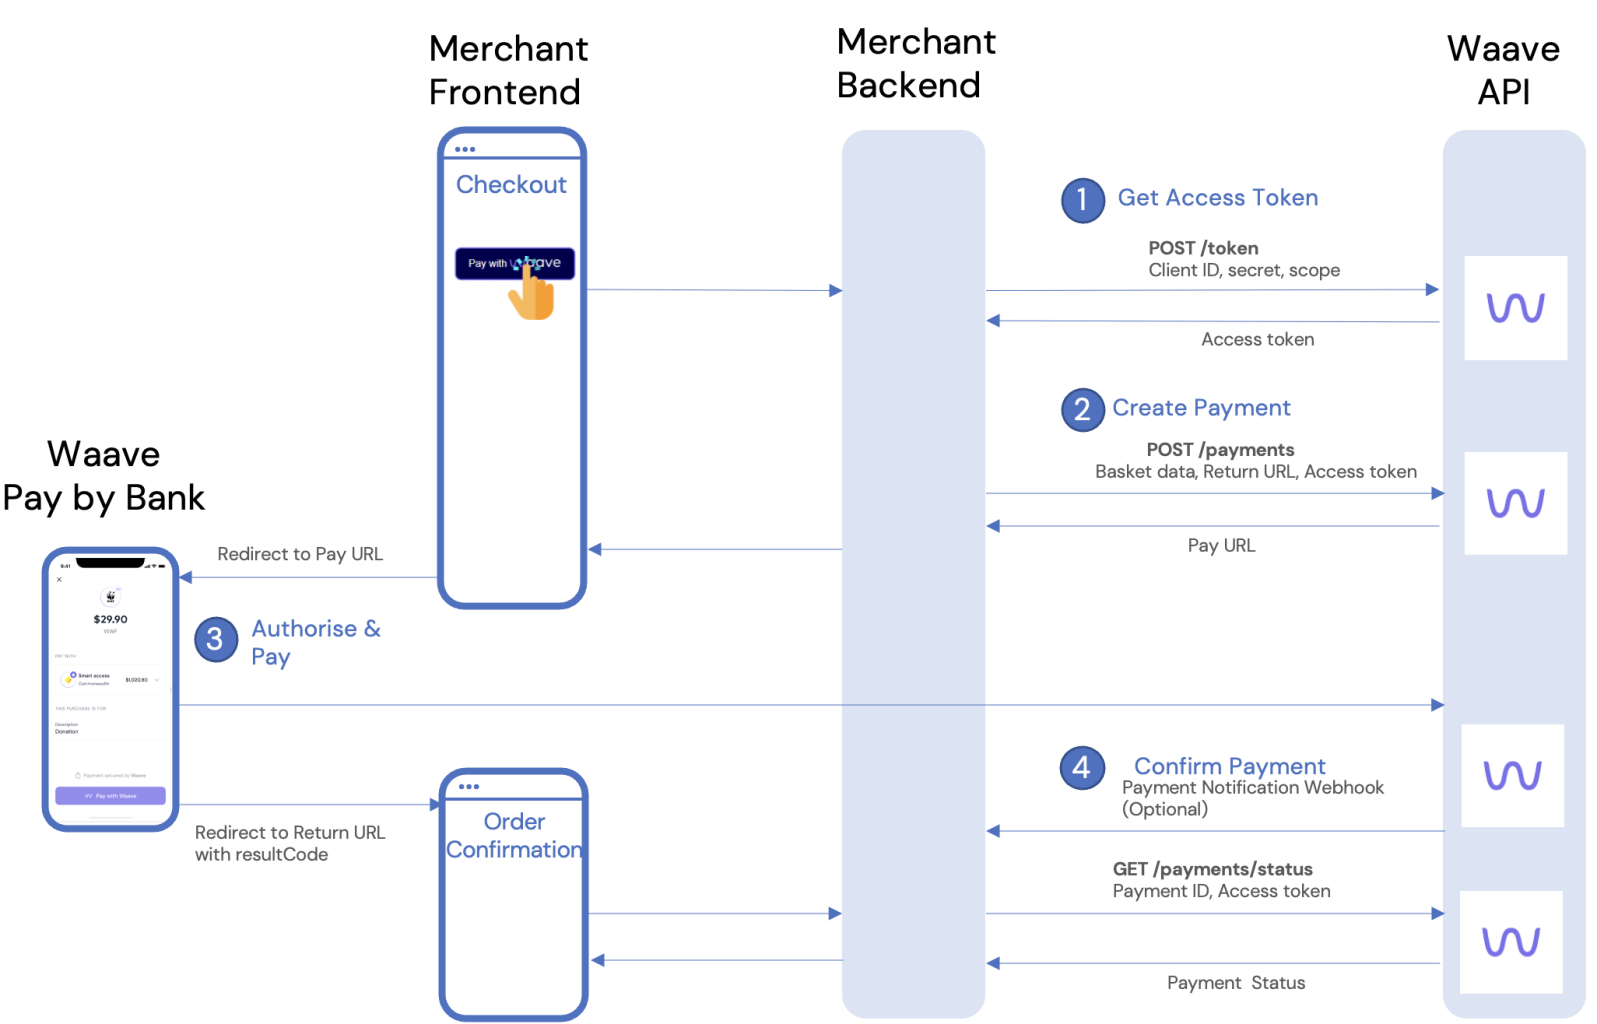
- When Waave is selected as the payment method, the merchant first requests an access token by calling the Waave Token API using the merchant client id and secret. This step must be performed from the merchant's backend to ensure the client id and secret are not exposed to the browser. The access token can be reused multiple times until its expiry, and it is recommended that the token be cached on the merchant's server for better performance.
- The merchant creates a Payment object by passing the access token, basket data and return URL to the Waave Create Payment API. The API returns a unique Pay URL in the response. The merchant redirects the shopper to the Pay URL.
- The Pay URL launches Waave Pay by Bank to authorise payment. If the shopper has not used Waave before, the Waave Web UI guides them through the sign up process before prompting for payment authorisation. On successful payment authorisation, the shopper is redirected to the return URL specified by the merchant in the previous step. Waave adds to the return URL a parameter indicating the outcome of the payment.
- The merchant's page calls Waave Payment Status API to verify the payment status before fulfilling the order. Optionally, the merchant can also subscribe to the payment notification webhook to receive payment status updates.
Payment Flow - In-Store Flow
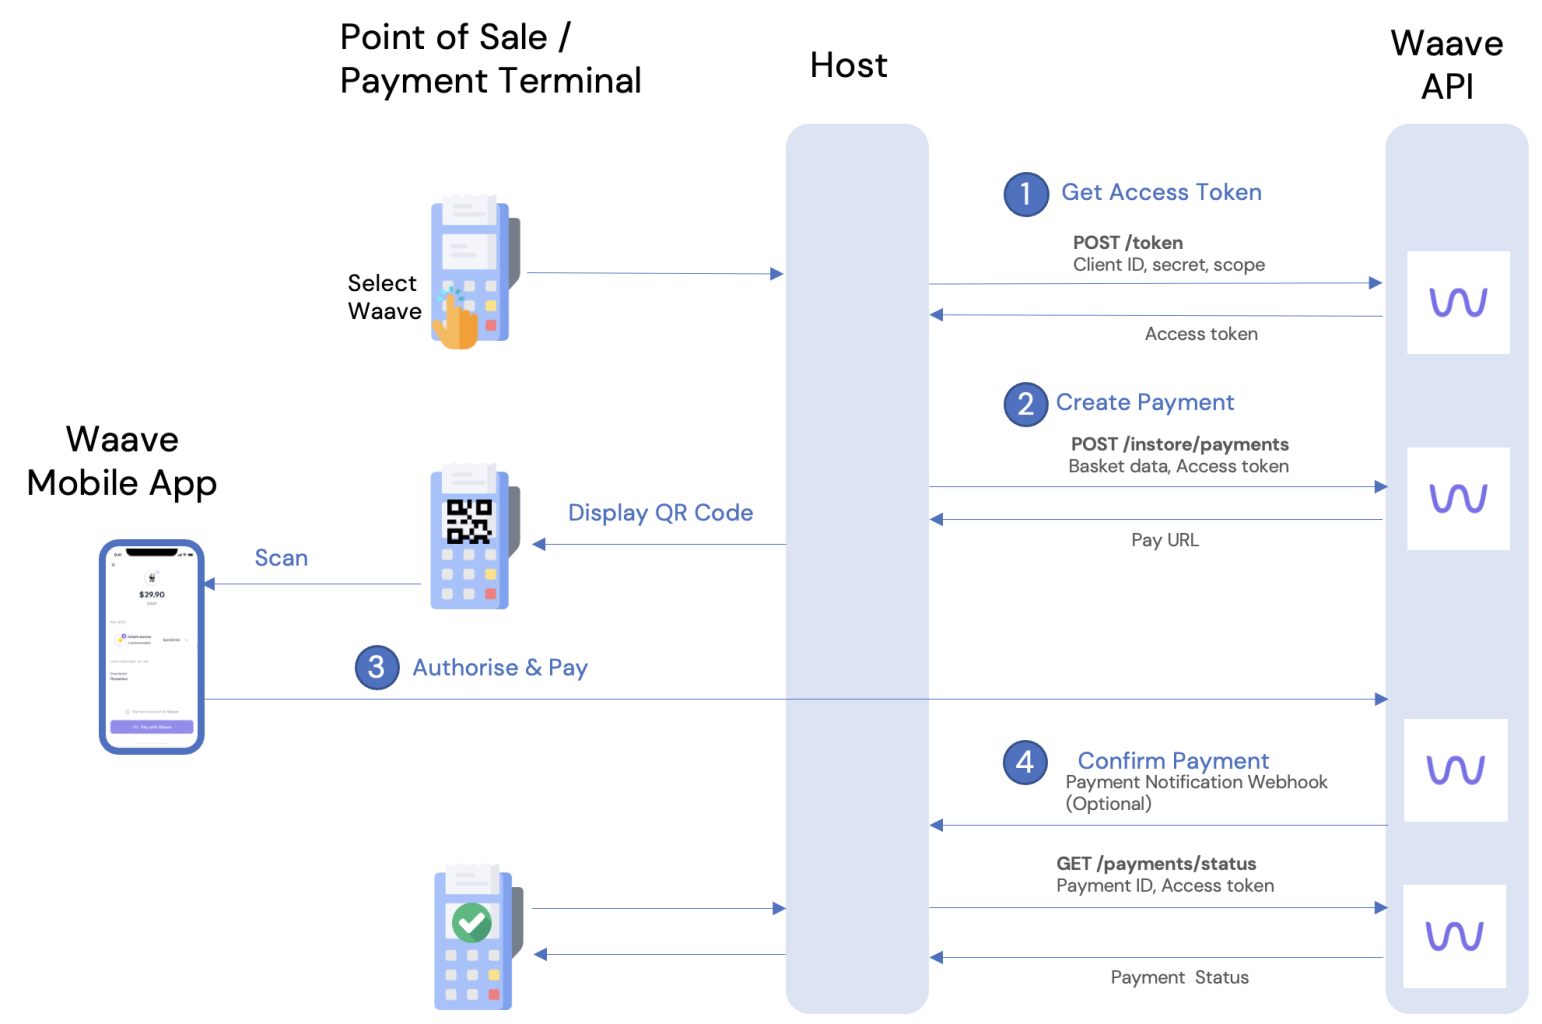
- When Waave is selected as the payment method on the payment terminal / point of sale, the host first requests an access token by calling the Waave Token API using the merchant client id and secret. The access token can be reused multiple times until its expiry, and it is recommended that the token be cached on the host for better performance.
- The host creates a Payment object by passing the access token and basket data to the Waave In-Store Create Payment API. The API returns a unique Pay URL in the response.
- The Pay URL is encoded into a QR code and displayed on the payment terminal or the customer facing screen of the POS. The customer scans the QR code on their device, which launches the Waave app on their device, and authorises the payment.
- The host calls Waave Payment Status API to verify the payment status before marking the payment as success. Optionally, the host can also subscribe to the payment notification webhook to receive payment status updates.
This illustrates the common online and in-store checkout scenarios. Please reach out to Team Waave if you are interested in other use cases such as tokenising Waave payments and charging the customer's account without redirecting to Waave each time.
Refund Flow
The refund flow is the same for online and in-store payments.
The merchant / host can initiate refunds by calling the Waave Refunds API. Waave supports full refunds and partial refunds, where the refund amount is less than the original tender amount. It is also possible to raise multiple partial refunds for a transaction, as long as the total refund amount does not exceed the original tender amount. Refunds must be initiated from the merchant backend.
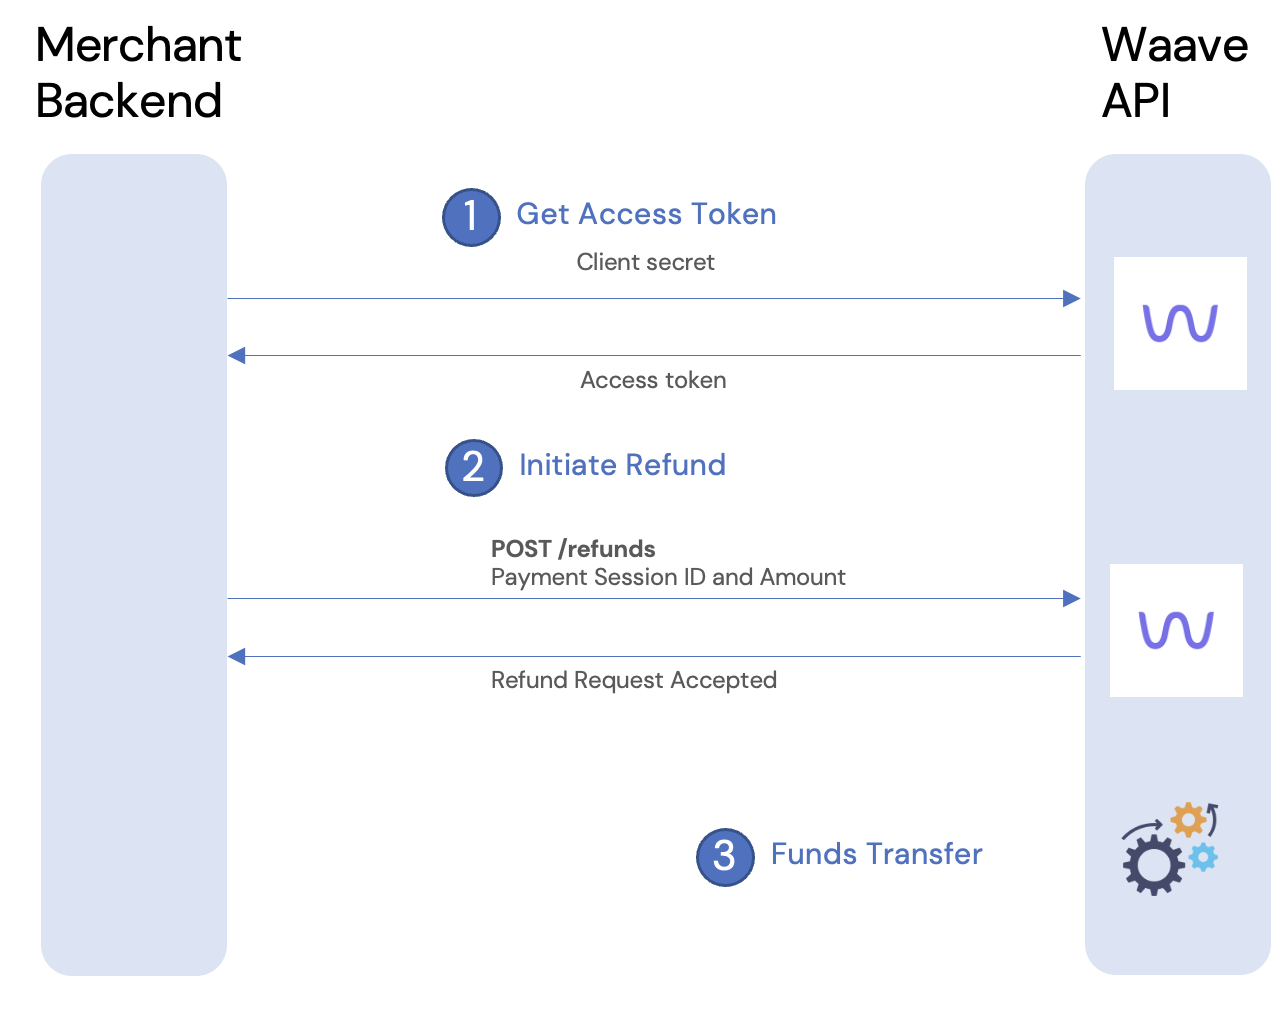
- The merchant / host requests an access token by calling the Waave Token API using the merchant client id and secret. This step must be performed from the merchant's backend to ensure the client id and secret are not exposed to the browser.
- Call the Waave Refund API to initiate a refund and pass the access token, payment session ID and the amount being refunded. Waave will perform pre-validation such as ensuring the total refund amount does not exceed the original tender amount. If the validation passes, Waave accepts the refund request and the API will respond with refund status of ACCEPTED.
- Once the refund is accepted, Waave processes the fund transfer within 1 to 4 business days.
Key Concepts
Client id and credentials
Client id and credentials are provided to the merchant during onboarding, and are needed to make calls to the Waave APIs.
Client id and credentials must be stored securely and must not be exposed to the browser or other 3rd parties.
Access token
An access token is required to create payment sessions and to query their statuses. The merchant can pass their client id and credentials to the Waave Authn API to create a new access token, and it is short lived.
When requesting an access token, a scope must be specified. The scope will determine which Waave APIs can be called using the access token. You must always request the minimum set of scopes needed for the flow / use case.
For example, when requesting an access token for the check out flow, you must not include the refund scope. Doing so would result in access tokens capable of performing refunds being exposed to the browser. For this reason, refunds must always be performed from the merchant's backend systems.
Updated about 1 year ago